Node.js
3장 Node.js와 익스프레스로 웹애플리케이션 서버 구현하기
컴맹99
2024. 2. 27. 23:47
3.1 OK를 반환하는 서버 만들기
3.2 라우터만들기
3.3 createServer() refactoring 하기
3.4 동적으로 응답하기
3.5 라우터 리팩터링하기
3.6 익스프레스 프레임워크 사용하기
3.7 익스프레스로 간단한 API서버 만들기
3.8 게시판 API 테스트하기
3.1 OK를 반환하는 서버 만들기
- const http = require("http"); 로 http 모듈을 불러온다.
- const server = http.createServer(); 로 서버를 만들고, server.listen()으로 서버를 시작한다.
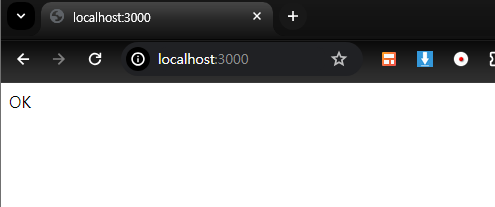
- 포트는 3000번이고, 3000번으로 http 요청시 OK를 보내주는 간단한 소스이다.
const http = require("http");
const server = http.createServer((req, res) => {
  res.setHeader("Content-Type", "text/html");
  res.end("OK");
});

server.listen("3000", () => console.log("OK서버 시작!"));
3.2 라우터만들기
- 위의소스에서는 어떤 요청을 하더라도 OK만 응답으로 보내준다.
- 일반적인 웹서버는 Url의 경로에 따라서 다른 결과를 보내준다. 이러한 기능을 라우팅이라고 한다.
- 아래는 Url의 구성요소이다.
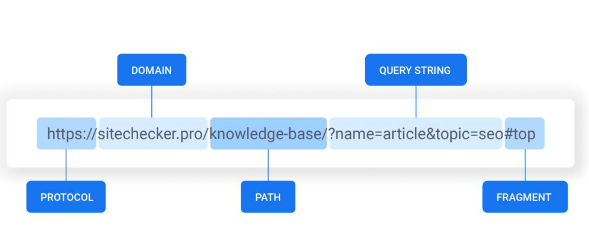
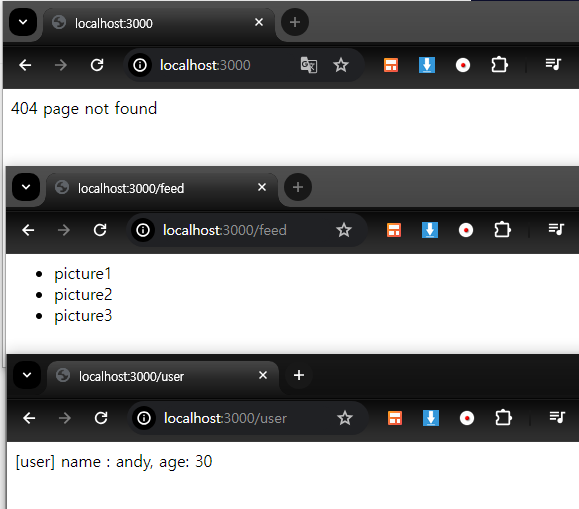
- 위의 기본소스를 수정하여, http://localhost:3000/user, http://localhost:3000/feed라는 두 Url에 대해서 각각 다른 응답을 주는 소스이다.
- const path = url.parse(req.url, true).pathname; 명령으로 Url을 파싱하여 path를 가져온다.
- 해당 path에 따라서 user,feed 에 따라서 각각 다른 결과를 보내준다. 그 외의 경우에는 404 오류를 출력한다.
const http = require("http");
const url = require("url"); // ❶
http
  .createServer((req, res) => {
    const path = url.parse(req.url, true).pathname; // ❷
    res.setHeader("Content-Type", "text/html; charset=utf-8");

    if (path === "/user") {
      res.end("[user] name : andy, age: 30"); // ❸
    } else if (path === "/feed") {
      res.end(`<meta charset="UTF-8"><ul>
            <li>picture1</li>
            <li>picture2</li>
            <li>picture3</li>
          </ul>
      `); // ➍
    } else {
      res.statusCode = 404;
      res.end("404 page not found"); // ➎
    }
  })
  .listen("3000", () => console.log("라우터를 만들어보자!"));
해당 소스를 실행하고 웹브라우저에 Url을 입력한 결과는 아래와 같다.
3.3 createServer() refactoring 하기
- 요청에 대한 모든 응답을 createServer()에서 처리하는건 좋지 않다. 처리를 위한 함수를 따로 분리해보자
- 아래소스는 각각의 요청에 따라 user(), feed() , notFound()함수로 분리하였다.
const http = require("http");
const url = require("url");
http
  .createServer((req, res) => {
    const path = url.parse(req.url, true).pathname;
    res.setHeader("Content-Type", "text/html");
    if (path === "/user") {
      user(req, res); // 1
    } else if (path === "/feed") {
      feed(req, res); // 2
    } else {
      notFound(req, res); // 3
    }
  })
  .listen("3000", () => console.log("라우터를 만들어보자!"));

const user = (req, res) => {
  res.end(`[user] name : andy, age: 30`);
};

const feed = (req, res) => {
  res.end(`<ul>
        <li>picture1</li>
        <li>picture2</li>
        <li>picture3</li>
      </ul>
      `);
};

const notFound = (req, res) => {
  res.statusCode = 404;
  res.end("404 page not found");
};
3.4 동적으로 응답하기
- 위의 서버소스는 언제나 같은 결과를 보여준다.
- 일반적인 서버는 유저의 요청값에 따라 다른 결과값을 보여준다.
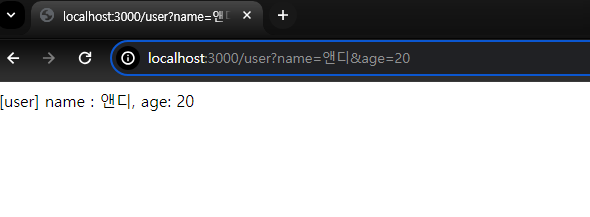
- 아래 소스에서는 http://localhost:3000/user 에서 querystring (name,age) 에 따라 다른 결과를 보여준다.
- query값을 가져오는 방법은 const userInfo = url.parse(req.url, true).query; 를 통하여 userInfo값을 가져오고 해당 값에서 userInfo.name,userInfo.age를 가져와서 출력한다.
const http = require("http");
const url = require("url");
http
  .createServer((req, res) => {
    const path = url.parse(req.url, true).pathname;
    res.setHeader("Content-Type", "text/html; charset=utf-8");
    if (path === "/user") {
      user(req, res); // 1
    } else if (path === "/feed") {
      feed(req, res); // 2
    } else {
      notFound(req, res); // 3
    }
  })
  .listen("3000", () => console.log("라우터를 만들어보자!"));

const user = (req, res) => {
  const userInfo = url.parse(req.url, true).query;
  res.end(`[user] name : ${userInfo.name}, age: ${userInfo.age}`);
};

const feed = (req, res) => {
  res.end(`<ul>
        <li>picture1</li>
        <li>picture2</li>
        <li>picture3</li>
      </ul>
      `);
};

const notFound = (req, res) => {
  res.statusCode = 404;
  res.end("404 page not found");
};
- 실행결과는 아래와 같다. name,age값에 따라 서로 다른 결과를 보여준다.
3.5 라우터 리팩터링하기
- 위의 소스에서는 함수가 3개인데, 만약에 100개가 넘어간다면 유지보수가 힘들어진다. 해당 소스를 좀더 수정해보자
- urlMap 에 해당 url과 함수를 맵핑한다.
- if (path in urlMap) {} 에서 해당 path가 urlMap에 있는지 확인하고 , 존재하면 urlMap[path](req, res);로 함수를 호출하고 없으면, notFound(req, res);를 실행한다.
- 주의할점은 urlMap이 소스의 제일 아래에 위치해야한다. 그렇지 않으면 const 로 선언한 변수는 초기화전에 읽을수없어서 에러가 나오게된다.
const http = require("http");
const url = require("url");

http
  .createServer((req, res) => {
    const path = url.parse(req.url, true).pathname;
    res.setHeader("Content-Type", "text/html");
    if (path in urlMap) {
      // 1
      urlMap[path](req, res); // 2
    } else {
      notFound(req, res);
    }
  })
  .listen("3000", () => console.log("라우터를 리팩토링해보자!"));

const user = (req, res) => {
  const user = url.parse(req.url, true).query;
  res.end(`[user] name : ${user.name}, age: ${user.age}`);
};

const feed = (req, res) => {
  res.end(`<ul>
        <li>picture1</li>
        <li>picture2</li>
        <li>picture3</li>
      </ul>
      `);
};

const notFound = (req, res) => {
  res.statusCode = 404;
  res.end("404 page not found");
};

// 3
const urlMap = {
  "/": (req, res) => res.end("HOME"),
  "/user": user,
  "/feed": feed,
};
- 아래의 소스는 문제없이 잘 작동된다. 함수선언이 아래에 있지만 호이스팅이 되기때문이다.
func();
function func() { console.log("Hoisting~~"); }
- 아래 소스는 오류가 발생한다. let,const,함수표현식,클래스표현식은 호이스팅되지 않기때문이다. 이런경우는 반드시 먼저 선언이 되어야만 사용이 가능하다.
func();
const func = () => console.log("Hoisting~~");
3.6 익스프레스 프레임워크 사용하기
- 지금까지는 기본라이브러리만을 사용하여 웹서버를 만들어 보았다. 하지만 실전에서 사용하기에는 기능이 많이 부족하다.
- 익스프레스는 웹개발을 위한 강력한 기능을 제공하는 프레임워크이다.
- 일단 익스프레스를 설치해보자
- 아래의 명령을 사용하여 익스프레스를 설치한다.
- npm install express
- 아래의 소스는 간단한 익스프레스 예제이다.
- require("express"); 에서 패키지를 로딩하고,
- app.listen()으로 클라이언트 요청을 기다리고,
- app.get()으로 "/" 요청이 오는경우 실행된다.
const express = require("express"); // ❶
const app = express(); // ❷
const port = 3000;

// prettier-ignore
app.get("/", (req, res) => { // ❸
  res.set({ "Content-Type": "text/html; charset=utf-8" }); // ➍
  res.end("헬로 Express");
});

// prettier-ignore
app.listen(port, () => { // ➎
  console.log(`START SERVER : use ${port}`);
});
- 이전에 만든 서버(http 패키지를 이용한 소스)를 익스프레스로 만들어보자
- 기존코드에서 urlMap으로 url매핑을 관리하는 부분은 없어지고 , app.get()으로 등록하도록 변경되었다.
- 기존코드에서 res.end()인데, 이번에는 res.json()을 사용하여 json타입으로 보여주었다.
- 기존코드는 const인데, 이번에는 호이스팅을 사용하기 위하여 function으로 변경했다.
- 사용하지 않는 변수는 _로 넣었는데, 사용하지 않는 변수는 빼는게 맞지만, 함수 인터페이스 구조상 넣을수밖에 없을때는 _로 변경하는게 관례이다.
const url = require("url");
const express = require("express");
const app = express();
const port = 3000;

app.listen(port, () => {
  console.log("익스프레스로 라우터 리팩토링하기");
});

app.get("/", (_, res) => res.end("HOME"));
app.get("/user", user);
app.get("/feed", feed);

function user(req, res) {
  const user = url.parse(req.url, true).query;
  res.json(`[user] name : ${user.name}, age: ${user.age}`);
}

function feed(_, res) {
  res.json(`<ul>
        <li>picture1</li>
        <li>picture2</li>
        <li>picture3</li>
      </ul>
      `);
}
3.7 익스프레스로 간단한 API서버 만들기
| 경로 | Http 메서드 | 설명 |
| / | get | 게시판 목록을 가져온다. |
| /posts | post | 게시판에 글을 쓴다. 글은 id, title, name , text, createdDt (아이디,제목,작성자,내용,생성일시) 로 구성된다. |
| /posts/:id | delete | 게시글을 삭제한다. |
- 익스프레스로 간단한 API를 만들어보겠다.
- posts는 게시글을 저장할 장소이다.
- express.json() 을 사용하여 json미들웨어를 사용한다. 이렇게 해야, req.body()를 사용할수있다.
- app.use(express.urlencoded({ extended: true })); 는 post요청이 application/x-www-form-urlencoded 인 경우 파싱을 위해 사용한다. application/x-www-form-urlencoded 타입이란 body에서 키=값&키2=값2 조합형태의 데이타를 말한다.
- app.get("/"...) 는 / 요청이 오면 게시판의 목록(posts)을 json형태로 보여준다.
- app.post("/posts" ,...) 는 post로 들어온 데이타를 게시물에 등록한다. res.body에 등록하려는 게시물의 정보가 있다. posts.push()를 통하여 해당 게시물을 등록한다.
- app.delete("/posts/:id" ...)는 id번호의 게시물을 삭제한다. posts.filter()을 사용하여 해당 게시물을 제외한 나머지를 filteredPosts에 저장하고 해당 값을 posts에 넣는다.
const express = require("express");
const app = express();
let posts = [];

// req.body를 사용하려면 json 미들웨어를 사용해야한다.
// 사용하지 않으면 undefined로 나옴.
app.use(express.json());

// post요청이 application/x-www-form-urlencoded 인 경우 파싱을 위해 사용.
app.use(express.urlencoded({ extended: true }));

app.get("/", (req, res) => {
  res.json(posts);
});

app.post("/posts", (req, res) => {
  console.log(typeof req.body);
  const { title, name, text } = req.body;
  posts.push({ id: posts.length + 1, title, name, text, createdDt: Date() });
  res.json({ title, name, text });
});

app.delete("/posts/:id", (req, res) => {
  const id = req.params.id;
  const filteredPosts = posts.filter((post) => post.id !== +id);
  const isLengthChanged = posts.length !== filteredPosts.length;
  posts = filteredPosts;
  if (isLengthChanged) {
    res.json("OK");
    return;
  }
  res.json("NOT CHANGED");
});

app.listen(3000, () => {
  console.log("welcome board START!");
});
3.8 게시판 API 테스트하기
- 게시판의 API를 호출하려면 웹브라우저만으로는 어렵다. curl을 사용하여 테스트해보자.
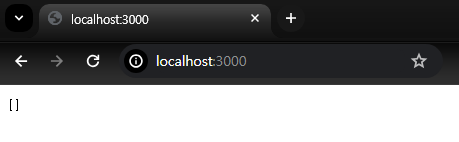
- curl -X GET http://localhost:3000 을 사용하거나 웹브라우저에 주소를 입력해보자.
- 아래의 명령을 사용하여 글을 3개 등록하여보자.
curl -X POST -H "Content-Type:  application/x-www-form-urlencoded" -d "title=TitleTest&name=andy&text=Hello" http://localhost:3000/posts
curl -X POST -H "Content-Type:  application/x-www-form-urlencoded" -d "title=TitleTest2&name=andy&text=Hello2" http://localhost:3000/posts
curl -X POST -H "Content-Type:  application/x-www-form-urlencoded" -d "title=TitleTest3&name=andy&text=Hello3" http://localhost:3000/posts
- 웹브라우저에서 확인하면 3개의 글이 등록된것을 확인할수있다.

- curl -X DELETE http://localhost:3000/posts/2 를 입력하여 2번째 게시글을 삭제후 다시 웹브라우저에 확인해보자.
